Uploading Documents
Bring files into the Lunr repository with the Create menu, the Upload button, or drag and drop, and understand when an upload becomes a new document, a new revision of an existing one, or a rendition attached to another.
Overview
There are two routes into the repository. Create starts a new document of a type your organisation has configured, and Upload takes files that already exist on your computer. Both sit at the top of the Action Pane on the right of the document list.
What matters most about an upload is which of three things it turns into: a new document, a new revision of a document already in the repository, or a rendition attached to an existing document. Lunr decides by comparing file names, covered under What an Upload Becomes.
The Create Menu
Select Create to open a menu of things you can start from here. Its contents depend on your organisation's settings and your access rights.
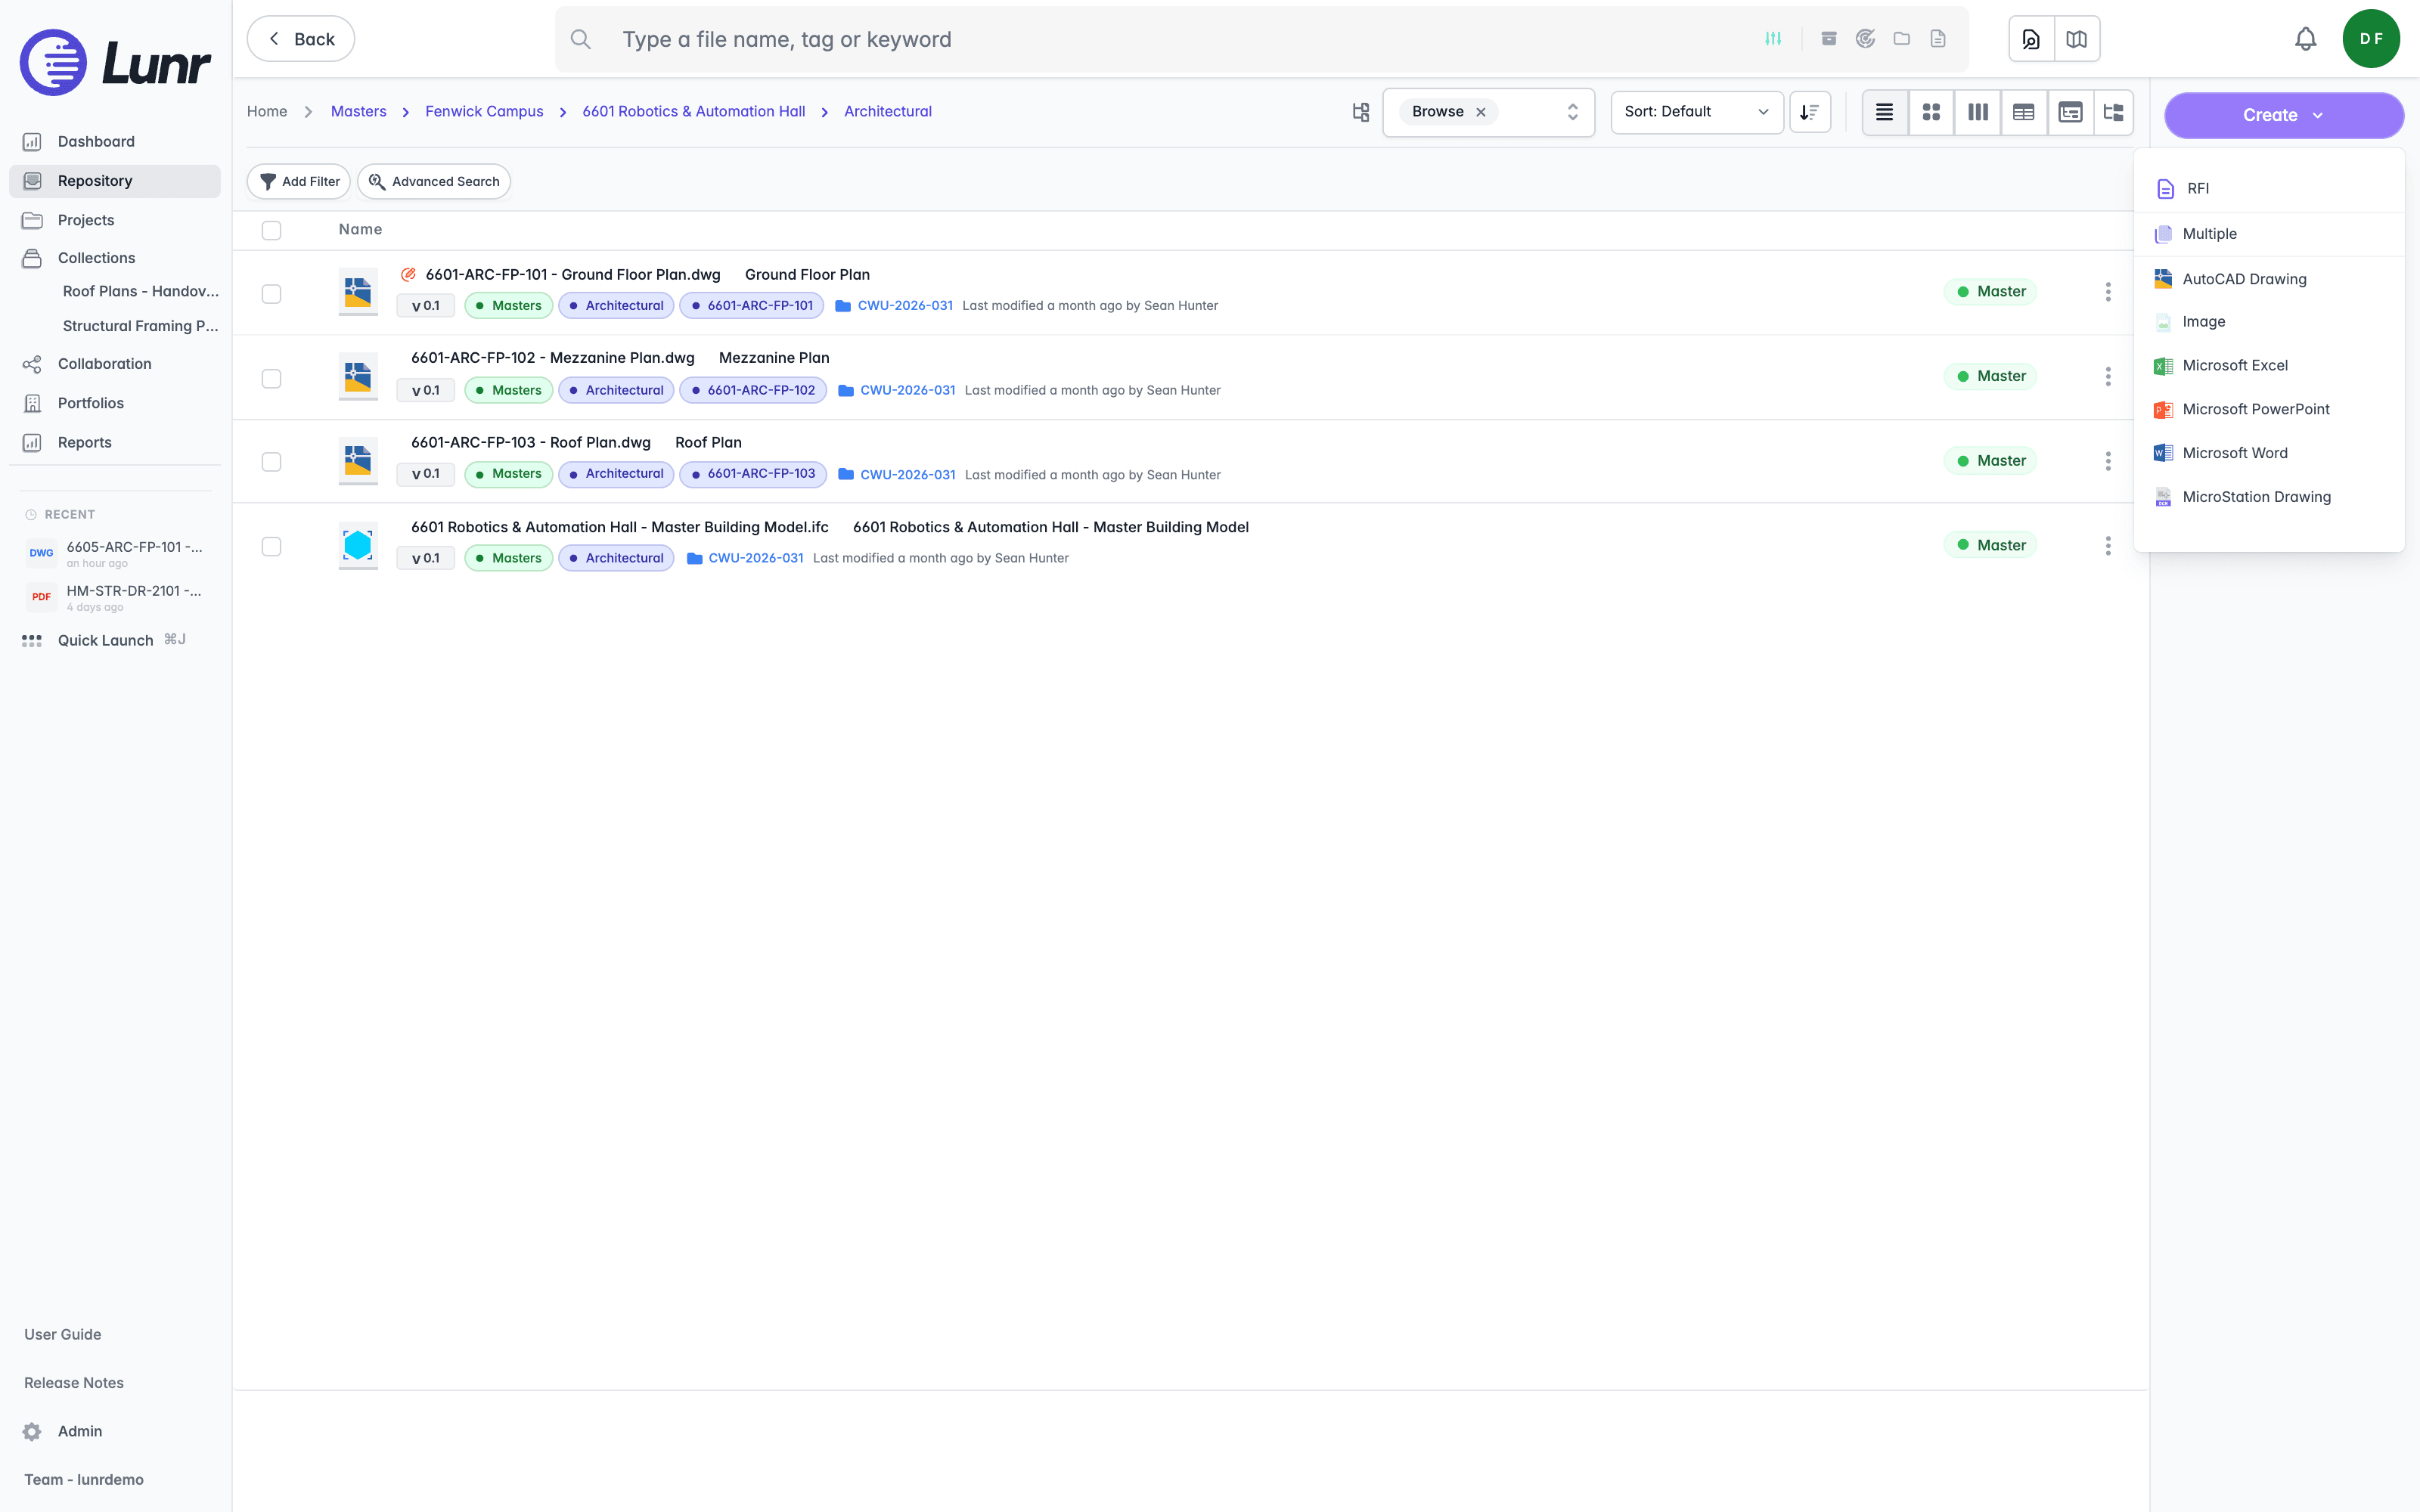
The first group holds records rather than documents, such as an RFI, labelled with your organisation's own wording. A Change Request entry appears where you can raise one, and a Drawing Numbers entry where document numbering is enabled.
The second group starts documents. Multiple takes several files at once, and below it sits one entry per document type your organisation has configured, each with its file-type icon, for example AutoCAD Drawing, Image, Microsoft Excel, Microsoft PowerPoint, Microsoft Word, and MicroStation Drawing. Choosing a type tells Lunr what the document is, so it can apply the right tags, numbering, and workflow.
Uploading Files
Select Upload to open your computer's file browser and choose the files to bring in. You can also drag files from your desktop straight onto the document list, which is quicker when you already have both windows open.
Files land in the folder you are looking at, so the tags of that folder are the tags the new documents pick up. Check the breadcrumb trail before you upload rather than moving documents afterwards.
What an Upload Becomes
Lunr checks whether the folder already holds a document of the same name, then takes one of three paths.
| The file you upload | What happens |
|---|---|
| Its name matches an existing document exactly, ignoring case and surrounding spaces | The upload replaces that document's content, creating a new revision. Its name, tags, and history carry over. |
| It is a PDF whose name matches a non-PDF document, for example Plan-01.pdf onto Plan-01.dwg | Lunr asks whether to attach it to that document as a rendition. Upload as separate document files it on its own instead. The prompt also explains how to make the PDF the document itself, covered in Turning a Drawing Into a PDF Document below. |
| Neither applies | Lunr creates a new document. |
The match has to be the whole file name. Plan-01.pdf does not claim Site-Plan-01.pdf, and Plan-01-revB.pdf does not claim Plan-01.pdf. Where an exact match and a same-name PDF both apply, the exact match wins, so a new revision of a PDF replaces that PDF rather than attaching itself to a drawing.
An exact name match replaces content without asking. If you mean to file a file as its own document, give it a name no document in that folder already carries.
Zip and Spreadsheet Uploads
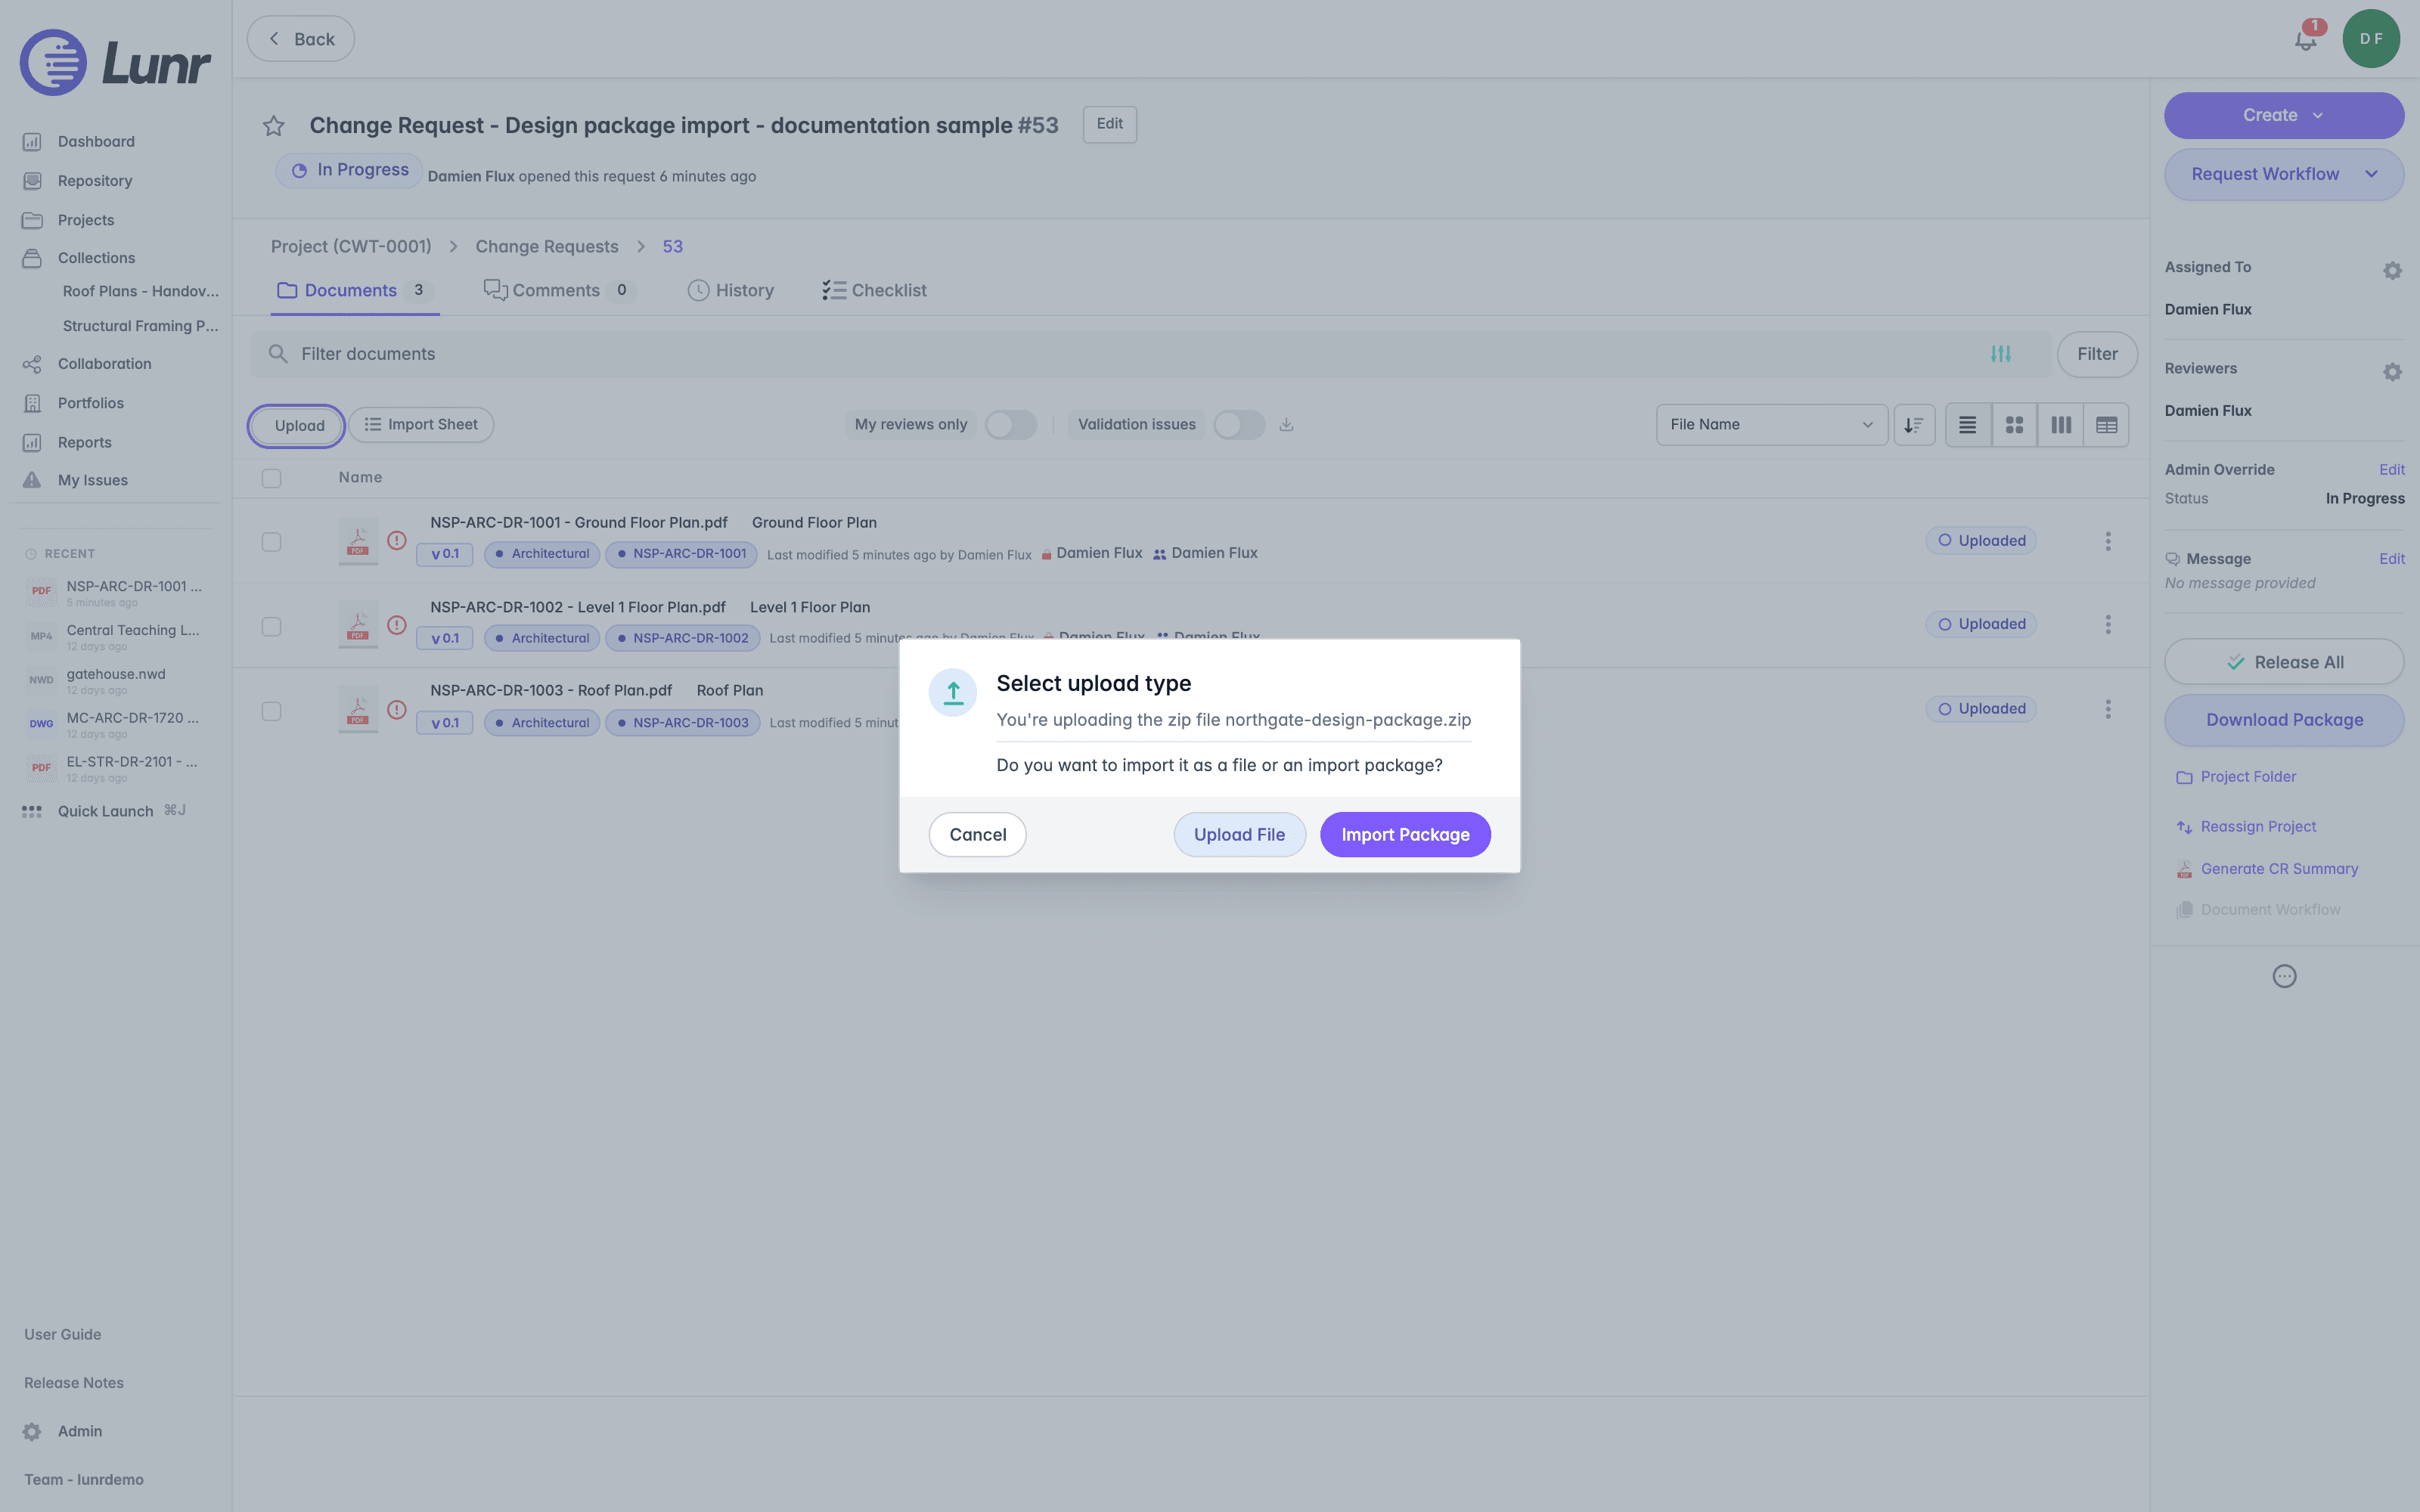
Inside a change request, two file types can mean more than one thing, so Lunr asks before it commits. Both prompts are headed Select upload type and offer Cancel if you would rather not go ahead.
- Upload a
.zipand the dialog reads "You're uploading the zip file" followed by its name, then "Do you want to import it as a file or an import package?". Select Import Package to unpack it and bring its documents in individually, covered under Import Packages, or Upload File to file the zip itself as a single document. - Upload a spreadsheet whose name starts with
Import_and the dialog reads "You're uploading the XLSX file" followed by its name, then "Do you want to import it as a file or bulk update tags in your package?". Select Update Tags to read the spreadsheet and apply its values to existing documents, or Upload File to file the spreadsheet itself as a document.
Neither prompt appears anywhere else. Upload a zip or a spreadsheet into the repository or into a project folder and Lunr files it as a single document without asking, so a package you mean to import has to go into a change request.
A spreadsheet raises the prompt only when its name starts with Import_. Any other spreadsheet becomes a document, whatever it holds.
Import Packages
An import package is a single zip that carries a set of documents and a spreadsheet describing them, so a consultant can hand over a whole task in one file rather than one upload per drawing. Lunr unpacks it, creates a document for each file, and reads the tag values for each one from the spreadsheet.
To import one, open the change request, select Upload, and choose the zip. At the Select upload type prompt select Import Package.
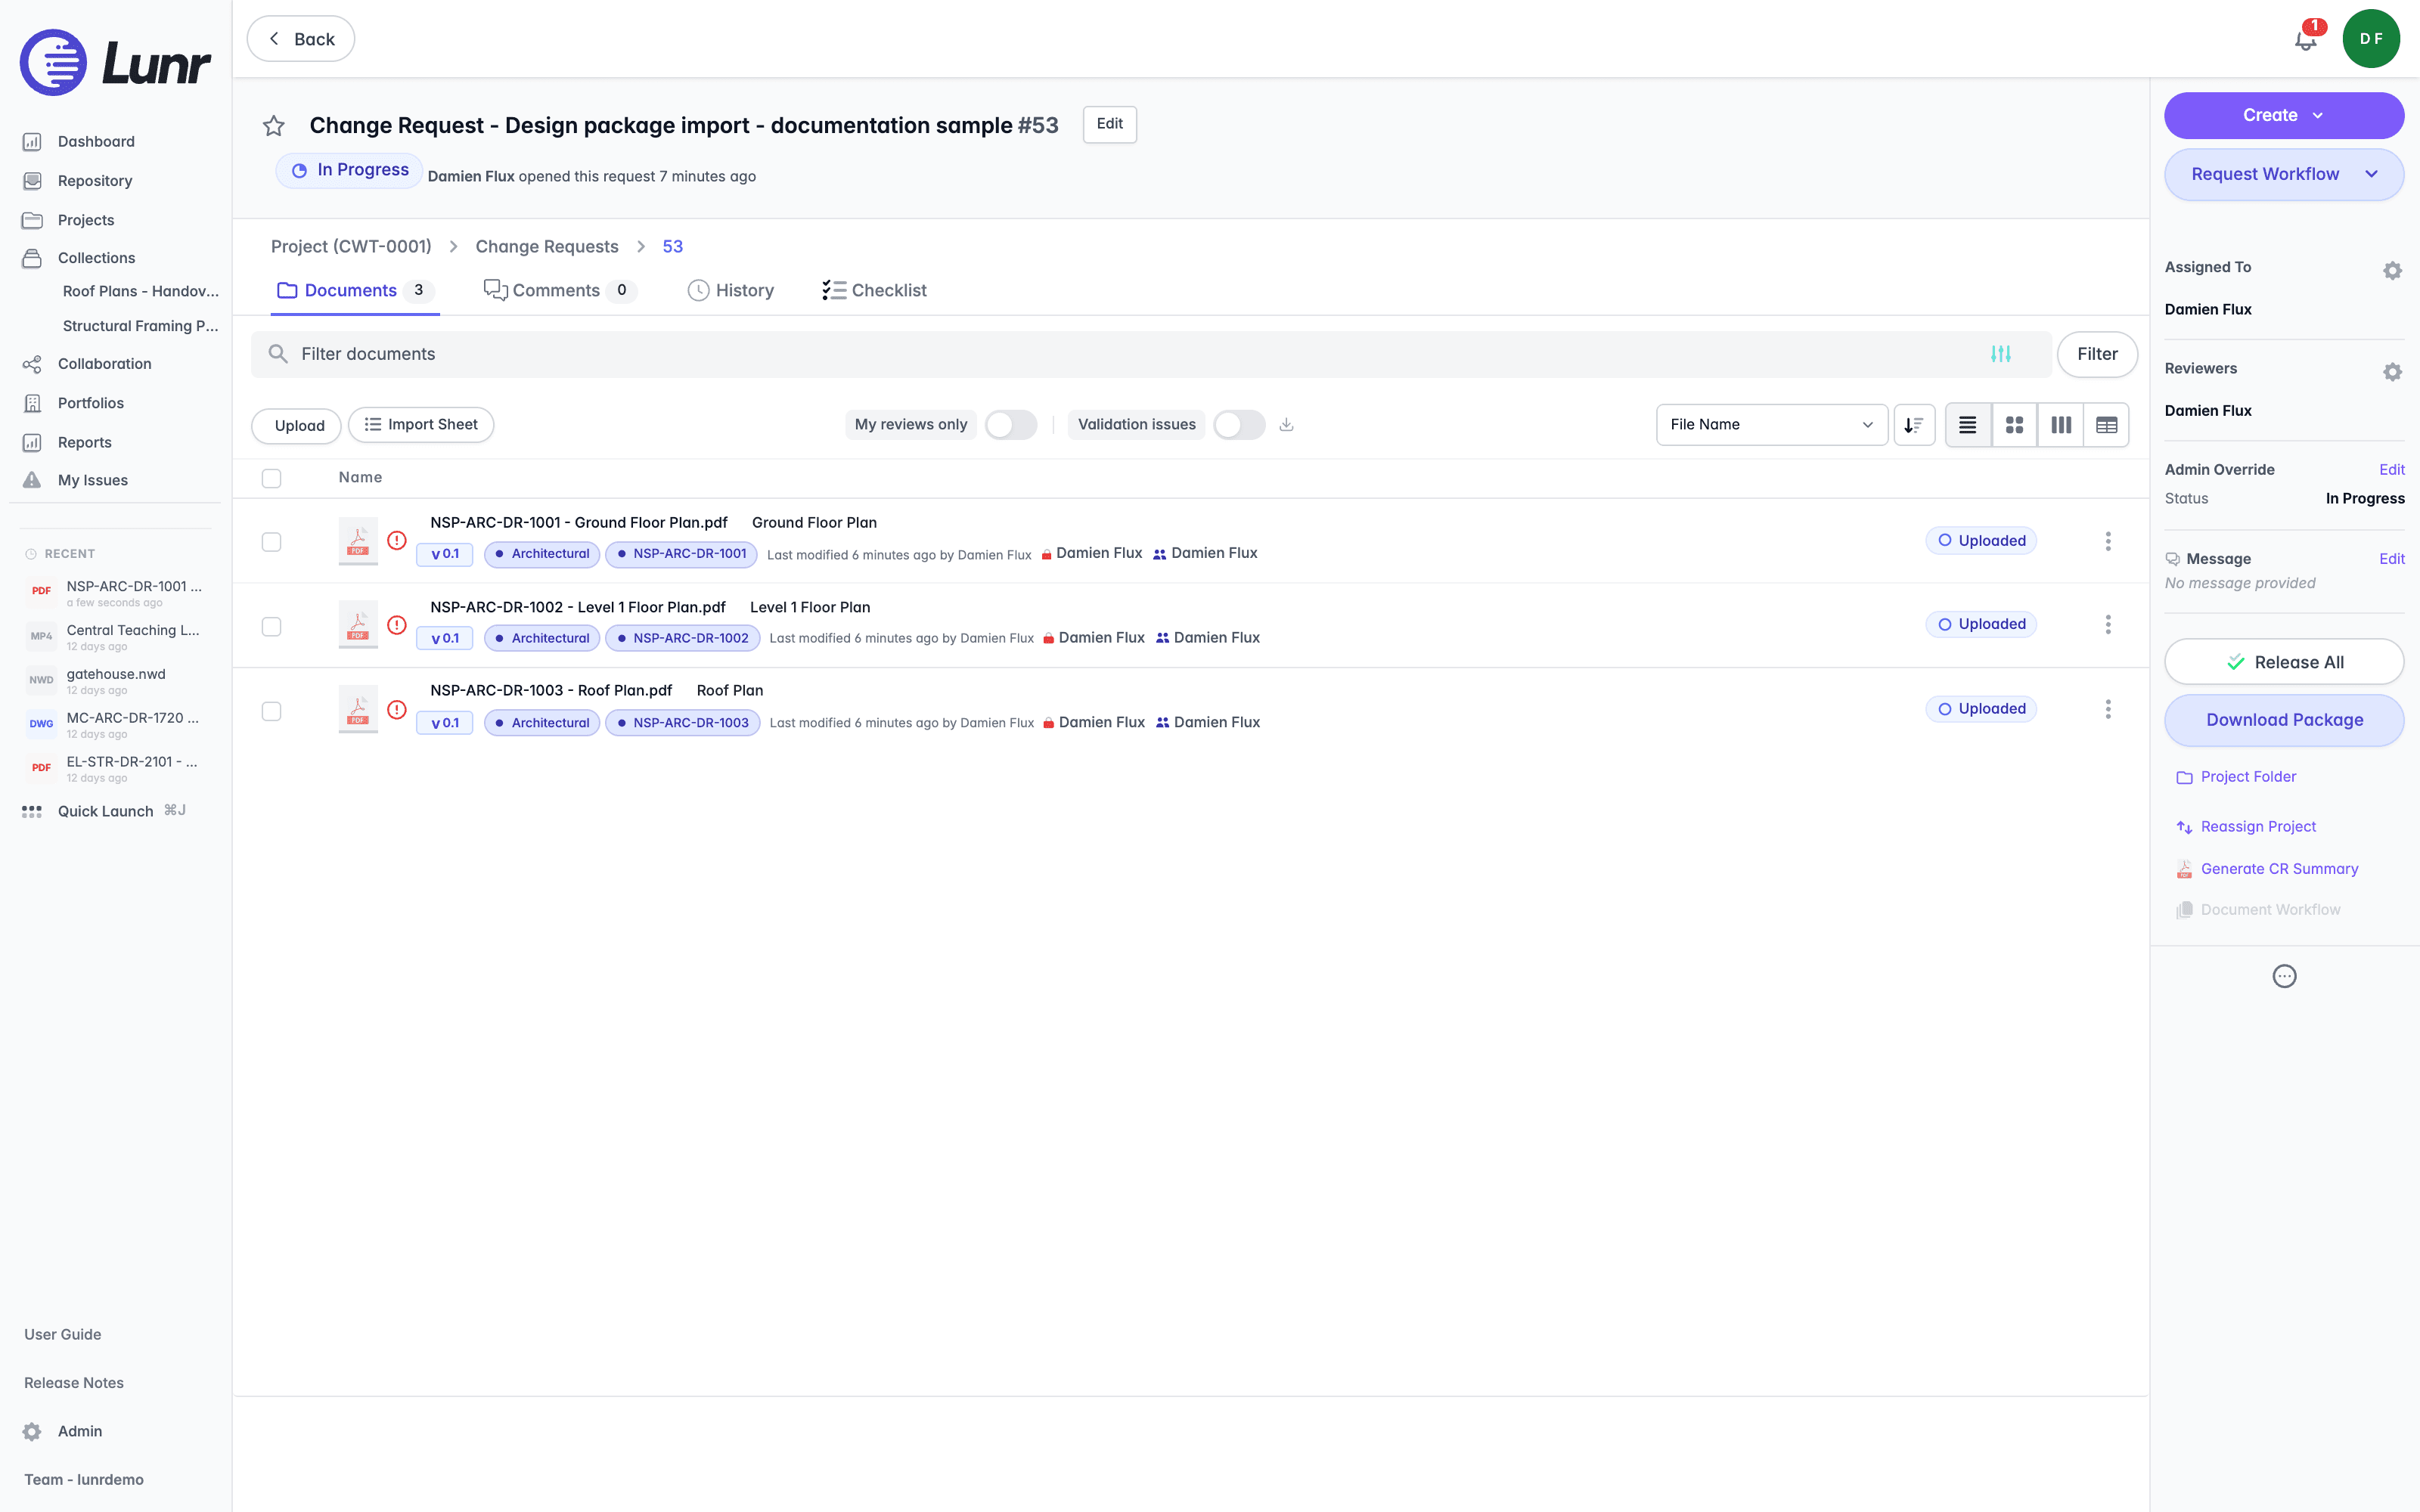
A progress bar headed Uploading package names the file and counts up while Lunr unpacks it, with Cancel alongside if you need to stop. The documents appear in the change request when it finishes, each at an initial version number and carrying the tags that were specified in the spreadsheet.
What an Import Package Contains
The zip holds the document files and a spreadsheet named exactly Import.xlsx. The spreadsheet has one row per document and one column per tag, plus a column holding the file name, which is what ties each row to its file. Your organisation sets which tags appear as columns.
The spreadsheet and the zip have to agree in both directions.
| The package | What happens |
|---|---|
| Every row names a file in the zip, and every file has a row | Lunr imports it. |
| A row names a file the zip does not hold | The import fails. |
| The zip holds a file no row names | The import fails, unless the file is a PDF, covered under Renditions in a Package. |
Where an import fails, Lunr names the files at fault, so you can correct the spreadsheet or the zip and upload again.
Give a multi-valued tag several values by separating them with || in the cell, for example Architectural||Structural.
The spreadsheet has to be named Import.xlsx exactly. Lunr looks for that name and ignores a spreadsheet called anything else.
Generating the Spreadsheet from a Folder
Rather than typing every file name by hand, let Lunr read the folder you are preparing and write the spreadsheet for you. Select Import Sheet, next to Upload in the change request, to open the Generate Import Sheet dialog.
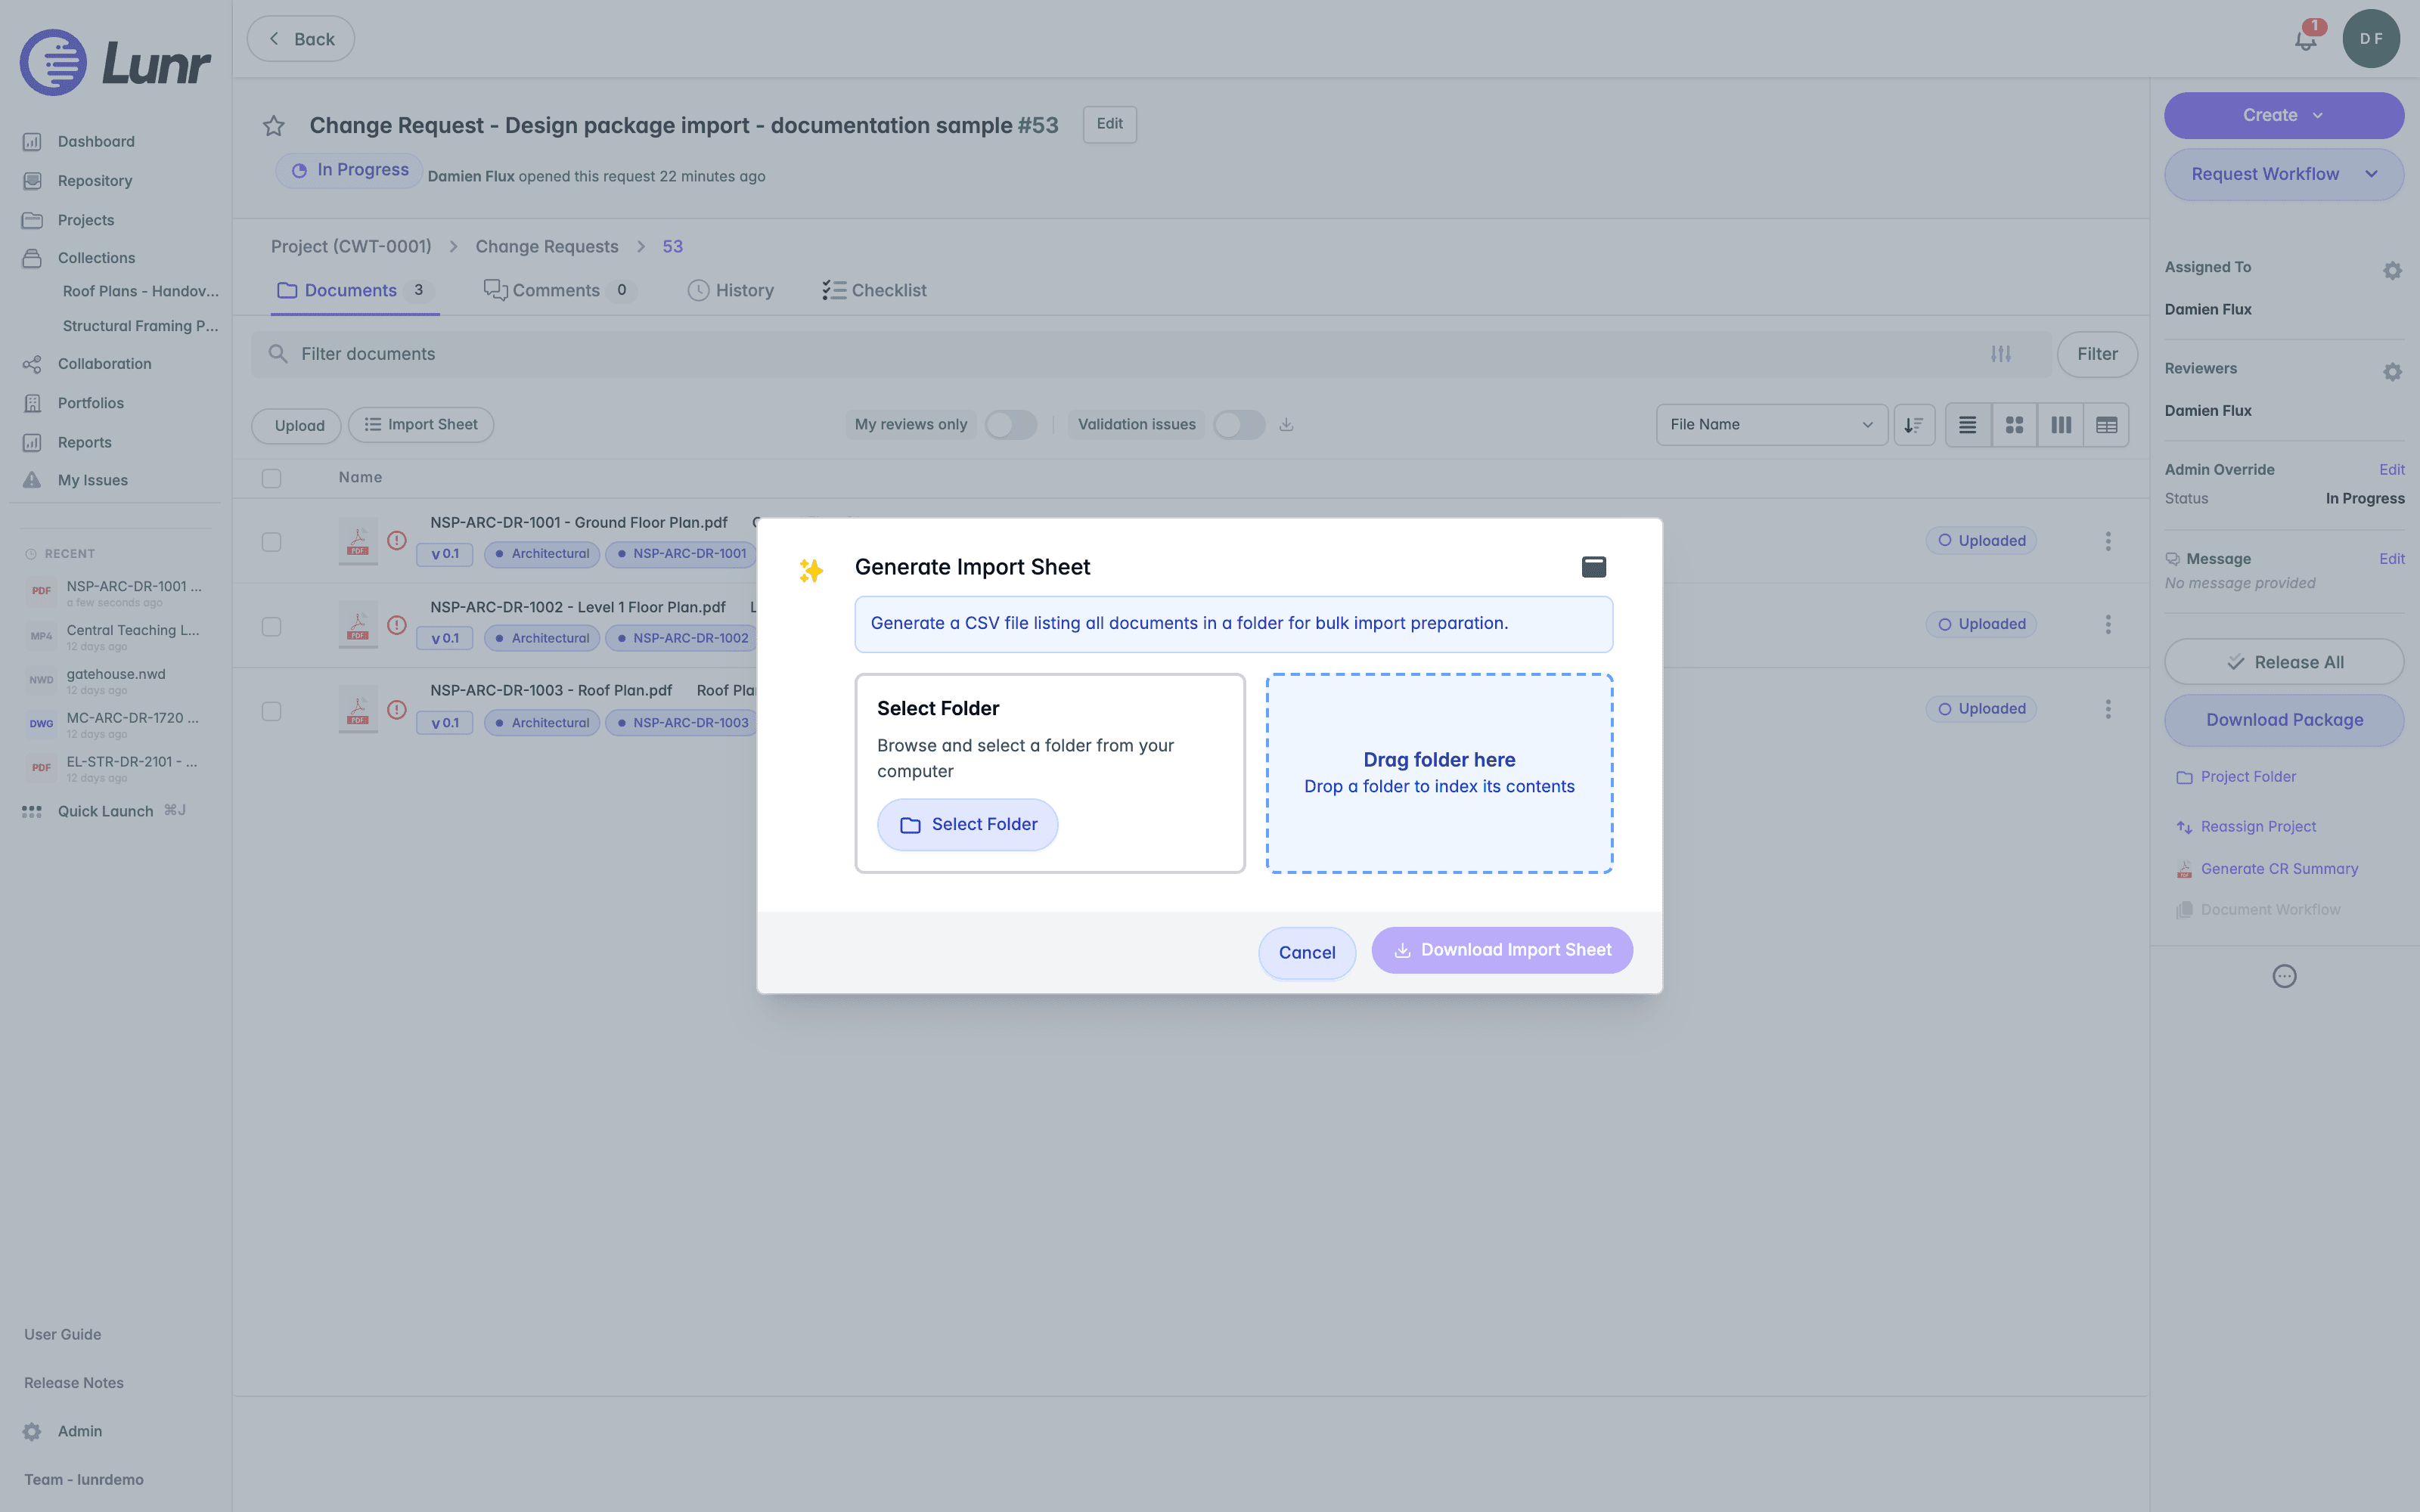
Choose the folder in one of two ways.
- Select Select Folder to browse for it on your computer.
- Drag the folder onto the Drag folder here area.
Lunr reads the folder, including its subfolders, and lists what it found. A summary line gives the number of files, their total size, and how many file types are present, and the list itself carries a File Name and Size column, with Show Path and Show Type adding the other two. Sort by selecting a column heading, and narrow a long list with the filter field, which matches on name, path, or extension.
Select Download Import Sheet to save the spreadsheet. It downloads as an .xlsx named for the change request and the date, for example Import_CR_53_20260923.xlsx, listing every file the dialog showed. Fill in the tag values, rename it to Import.xlsx, and zip it with the files themselves to make the package.
Checking the Folder Against the Change Request
Select Scan Package to compare the folder with the documents already in the change request before you generate anything. Lunr adds a Status and a Validation column to the list and counts how many files it can and cannot take, sorting each one into New, Updates, or Skipped. Where a file cannot be taken, the Validation column gives the reason. Select Rescan Package to run it again after changing the folder.
Applying a Tag to Every File
Default Tag Values sets a tag once and writes it against every row, which suits the values a whole issue shares, such as a discipline or a status. Select Add Tag, choose the tag, and give it a value, either by entering one or by choosing from the list where the tag has fixed values. Each tag you add becomes a column in the list, so you can see what the spreadsheet will carry before you download it. Remove a tag with the remove icon at the end of its row.
Renditions in a Package
A PDF is the one file the zip can carry without a row of its own, because a PDF can ride along as a rendition of another document. Lunr matches it on its name without the extension and accepts it where either of these holds.
- The spreadsheet has a row for a file of the same name, so a row for
Plan-01.dwgcoversPlan-01.pdf. - The zip holds a file of the same name that is not itself a PDF, so
Plan-01.dwgalongsidePlan-01.pdfcovers it.
A PDF matching neither fails the import, and two PDFs of the same name cannot cover each other, because the partner has to be a file of another type. The exception runs one way only: it lets the zip carry a file no row names, and never lets a row name a file the zip does not hold.
Validation Issues After an Import
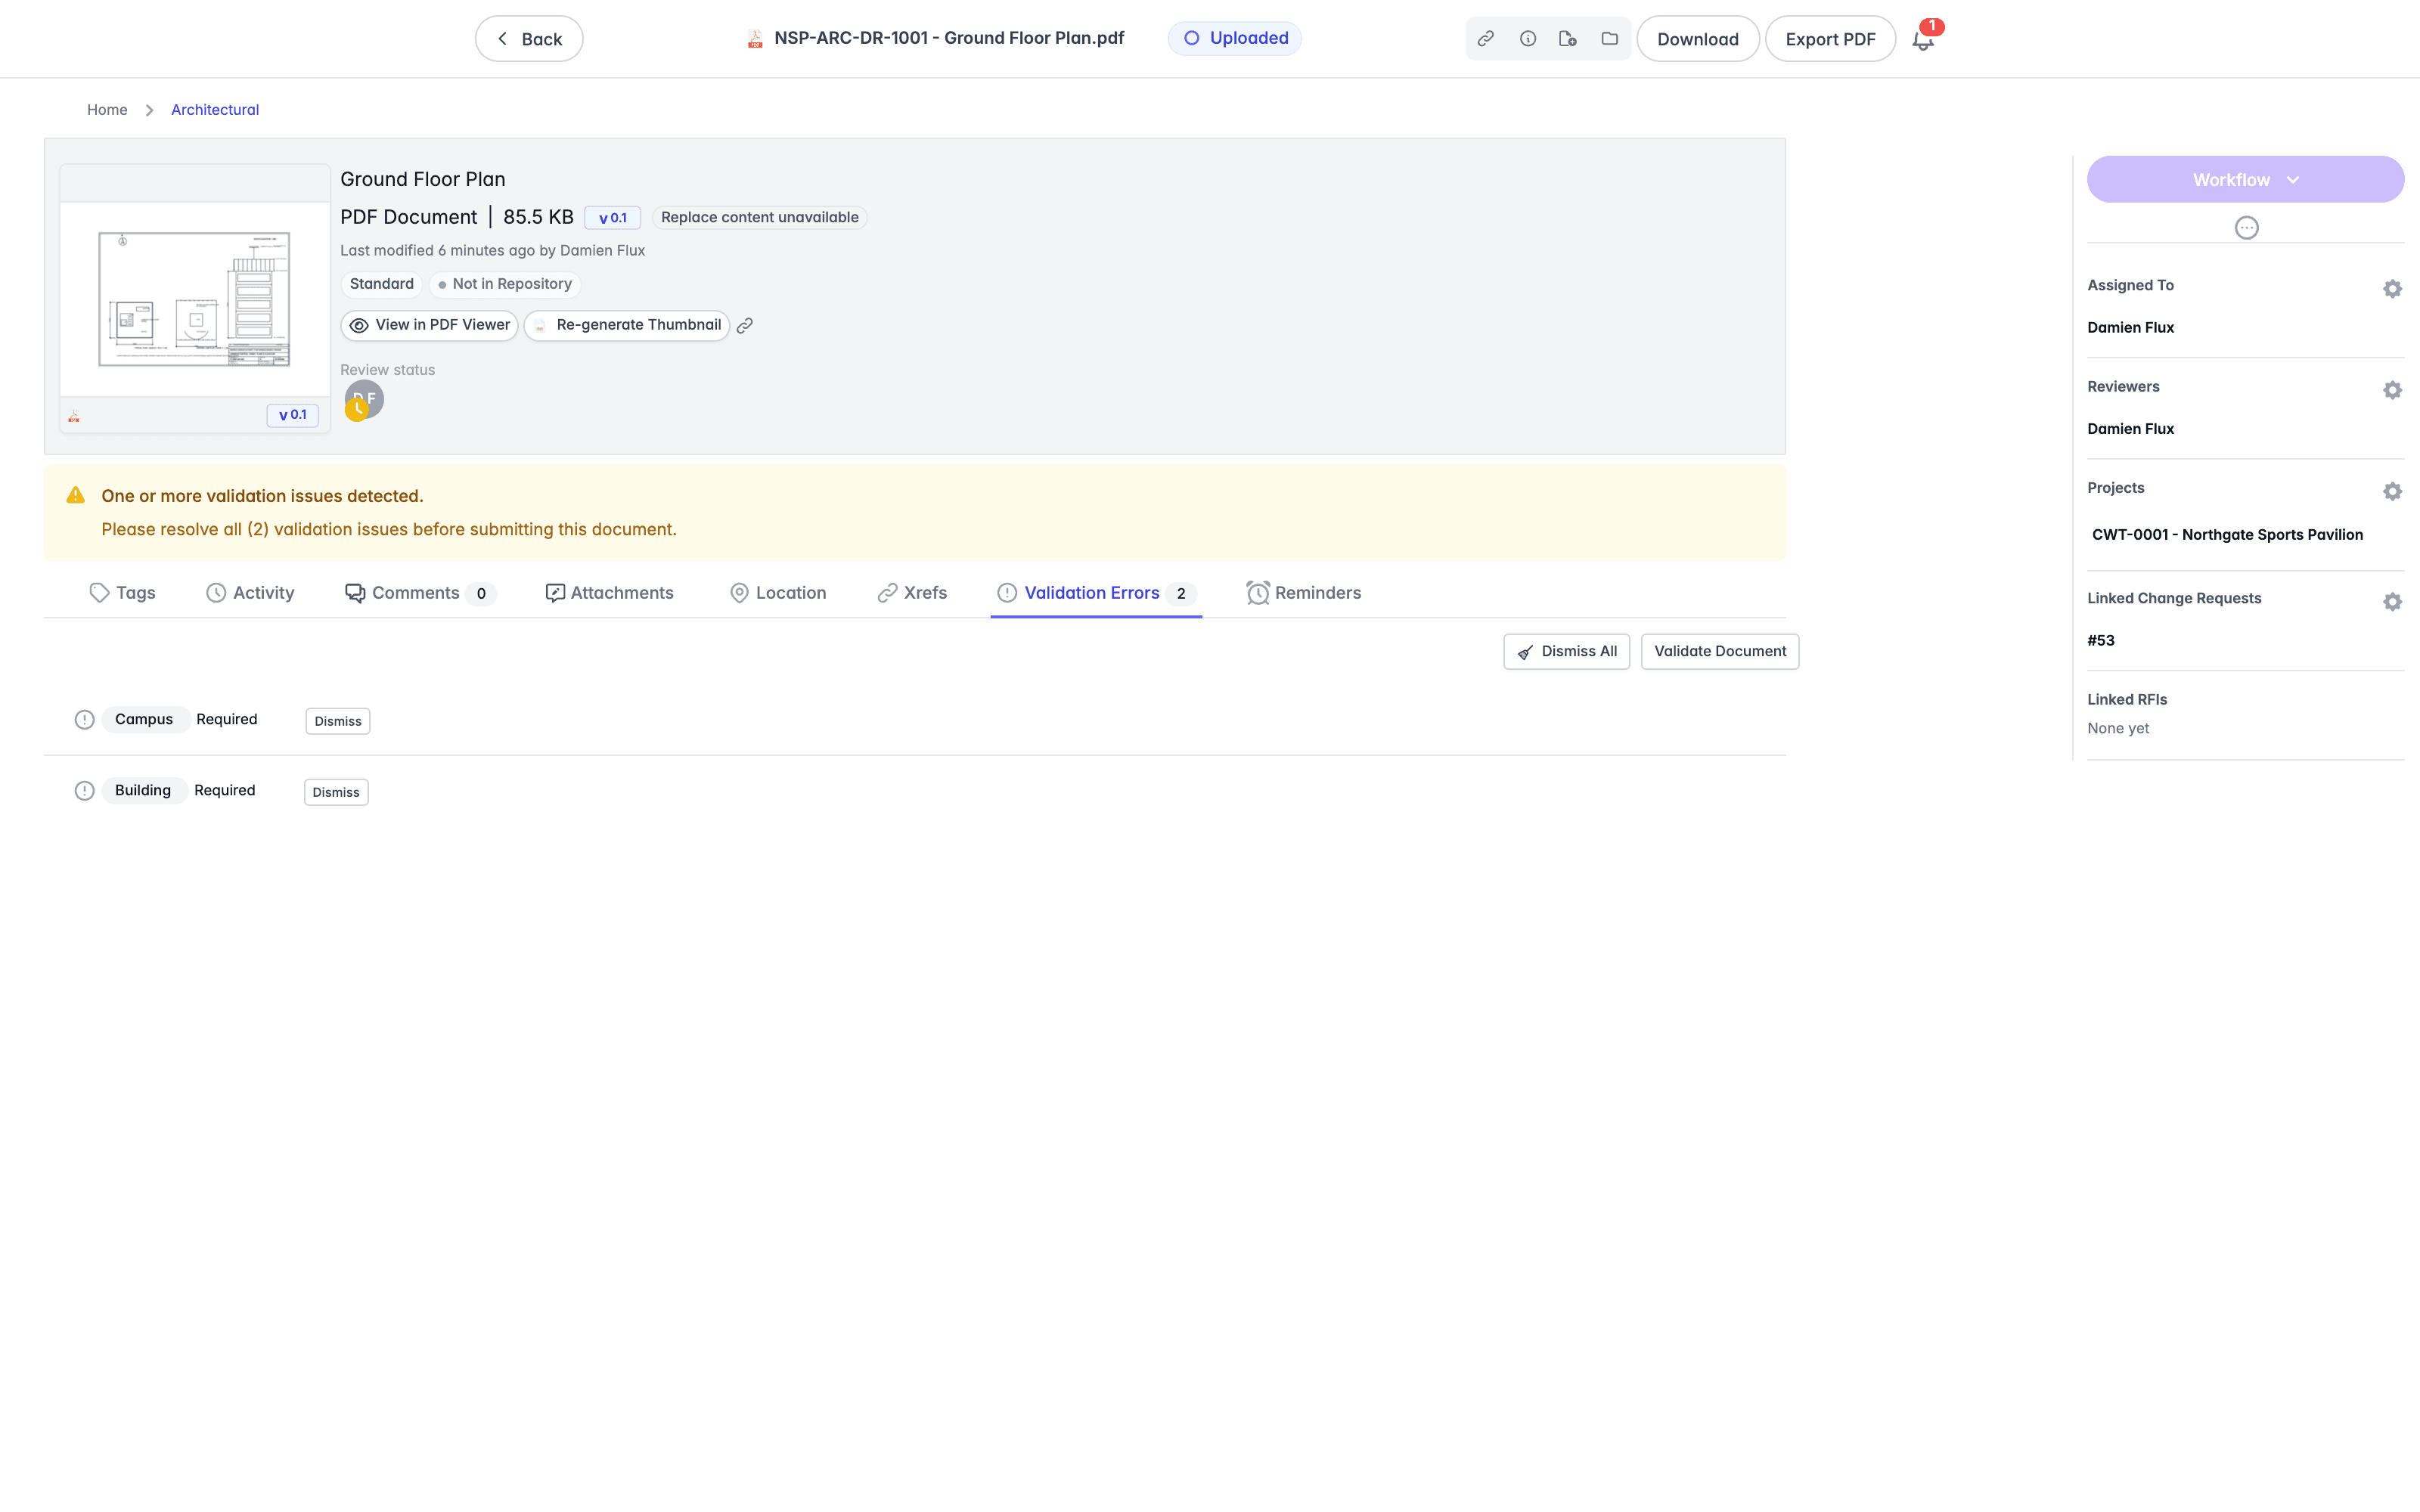
Where a required tag has no column in the spreadsheet, Lunr still imports the document and flags what is missing, and a banner reads "We found one or more validation issues with your package" above a count of the issues and the documents they affect.
Work through them from the Validation Errors tab on each document, which lists each missing tag against Required, covered under Validation Errors. Fill the tags in and the flags clear, or clear the whole package at once by selecting the documents and choosing Dismiss Validation Issues.
Replacing a Document's Content
To replace one document's content deliberately, choose Replace Content from its Options menu, opened with the three dots at the end of its row, then pick the file.
Where the file you pick carries a different name from the document, a Replace Document Content dialog opens, subtitled "You're uploading a file to replace existing content". It shows the Current Document and the New Document so you can see both names, and a Document Name After Upload field you can edit.
- Leave the name as it is and the dialog reads "Content will be replaced", noting that the content changes while the name stays the same. The action reads Replace Content.
- Change it to the new file's name and the dialog reads "Document will be renamed", naming both the old and new names. The action reads Rename & Replace.
Select Cancel to abandon the upload. Where the names already match, no dialog appears and the content is replaced directly.
Turning a Drawing Into a PDF Document
A document whose native file is a drawing, such as a DWG, keeps its PDF as a rendition rather than as the document itself. To make the PDF the document, rename the document to .pdf first, which promotes its existing rendition to be the document's content, then upload the PDF again to replace that content.
Renaming to .pdf needs a rendition to promote. Where the version has none, the rename is refused and the name reverts.
Uploading in a Project or a Change Request
The name-matching rules on this page apply when you upload into a project or a change request as well as into the repository. The zip and spreadsheet prompts do not: they appear only in a change request, covered under Zip and Spreadsheet Uploads. Three further things differ:
- Files pick up the tags of the project or change-request folder you are in, and that folder's default document type where one is set.
- A member with the Change Requests Only access level can upload into a change-request folder they belong to, but not to the project root. See Project Members and Access.
- A project can override some organisation defaults that affect uploads, including how change-request uploads are handled and whether form recognition reads fields from uploaded forms into tags. An administrator sets these, covered under Editing a Project.
See Working in a Project for the Documents tab itself, and Change Requests for the ways documents reach a request.
Validation Errors
A document can arrive without everything your organisation requires, for example a missing tag. Lunr keeps it and flags it rather than refusing the upload, and a Validation Errors tab appears on the document listing what is outstanding. Dismiss All clears the flags on that document once you have dealt with them.
To clear flags across several documents at once, select them and choose Dismiss Validation Issues from the Archive & Delete group of the More menu, covered in Document Actions.
Version History
Open a document's version history to see every revision it holds, restore an earlier one as the current version, insert or reorder versions, and rename, download, delete, or suppress an individual version.
Downloading Documents
Download native documents and PDF renditions individually or as packages, understand the PDF Export options, track packages on the My Downloads page, and know the permissions, retention, and limits that apply.